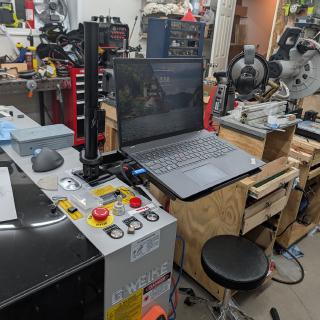
I got in a lot of shop and maker time this weekend. Most of it is on a project I can't talk about yet, but I thought I'd drop a few notes about some of the other things I got up to.
Laser Hacking My Gweike M3 (the one I moved into the basement back in June) showed up with a pretty major defect: the polycarbonate lid is warped. Looking back at my pictures, it seems to have arrived that way.
Here it is in my driveway the day I got it. You can see the big hump at the back of the black bit on top. The hump is big enough that if you just happened to be standing in exactly the wrong place, it is somewhat possible that a scattered reflection could escape and do damage. I have been wearing laser safety glasses when operating it, even with the lid closed, for that reason.
I did talk with Gweike support about it, and they asked if I thought it could be fixed. I said yes, because honestly, I do: it just needs something to block the light, and I figured putting a batten across the gap where the lid sits on the lid frame would work. They kindly sent me some consumables as compensation.
Of course it sat for a while. I have been chipping away at it. Unfortunately literally: I had the, as it turns out, dumb idea to just force it into submission with some bolts. The polycarb did not like that, and the first time I heard a little crack, I abandoned that idea.
Instead, I went back to the batten idea. I was going to use steel, but my experience with the polycarb made me super gun shy: I wanted something with more give. So: plywood. Cheap, I have a bunch of it, and soft.
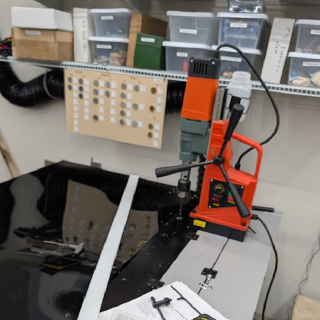
It was also a chance to use my Vevor Mag Drill. I think this is the first time I've drilled holes with it, but the frame is steel, so it was a convenient way to make sure they were straight, since I had to get all the way through both sides of the box tube that makes up the frame.
The Vevor Mag Drill, used to drill straight holes through the steel frame. Another view of the Vevor Mag Drill. After that, it was a simple matter of cutting a piece of plywood, painting it black, and bolting it in place. A view of the inside. You can see where I used some epoxy putty to seal up a few errant holes. I really like that stuff. Easy to work with, dries really hard.
A view of the inside, with epoxy putty sealing a few errant holes. Even with all that work, you can see there's still a lot of waviness in the lid. Oh well - good enough. Next up on the laser will be finding some way to get a keyboard mounted to it.
...